BETTER ACTION FIGURE PHOTOS
THROUGH CHEAP DIORAMAS
by Davy Stone
(photos and customs by Davy Stone & Chip Kraus)
Overview
So you've built yourself an action figure from scratch,
and now you want to put it on the internet to show off to the world.
Or maybe you're tired of the way that super team you've collected over the
years looks just sitting in front of the encyclopedias on an overcrowded
bookshelf and you want to make them look more majestic. An action figure by itself in front of a plain white background
might look ok, but when posed in a diorama, action figures can really come
to life, looking less like the toys they are, and more like a picture from
a comic book world come to life.
But unfortunately, if you buy as many frivolous
toys and comics as Chip and I do, you probably don't have the money to really invest
in supplies to build dioramas. But you still want your figures
to look as professional as possible when you photograph them and post them
on the 'net. What options do you have?
I visited a hobby shop a while ago. I was thinking about building dioramas,
and so I wanted to check out
what sort of helpful supplies they might have. Well, I found all
sorts of interesting things, from sheet styrene made to look like siding,
tiles, and sidewalks, to trees and mountains for model trains, to.... well,
just about anything you'd need to build a diorama. The biggest problem
for me was that I couldn't afford much of anything after all the money
I spent on toys that morning. So I decided to challenge myself and
see just what sort of diorama I could make without spending money, or at
least spending as little money as possible.
Now, I hope I can share some of what I've found with you.
I'm going to try to explain some of the thinking behind my dioramas, and along
the way I hope to include some helpful tips for folks who want to make better
dioramas for their own photos.
First,
let's go over a few things you should consider before
you begin.
-
Plan ahead. Things will go much more
smoothly if you've thought through your project. Just like life.
-
Consider what sorts of settings your heroes would
actually appear in. Look at your figures and see what sorts of
common denominator locales you can come up with. City streets, alleys, hi-tech
headquarters are options for some figures, but perhaps not all. Regardless of what kind of figure you're photographing, you will need to come up
with a scene that makes sense with your figure(s).
-
Be Flexible.
Even though
Chip and I customize two distinct styles of superheroes, I've been very
comfortable placing either style in any of my dioramas. The reason:
I'm photographing to focus on my figures, not my dioramas, and therefore
the details of the dioramas just aren't that important. I use this
philosophy as my guide: if I like the way something looks, I'll use
it! It's that simple. If you like it, do it.
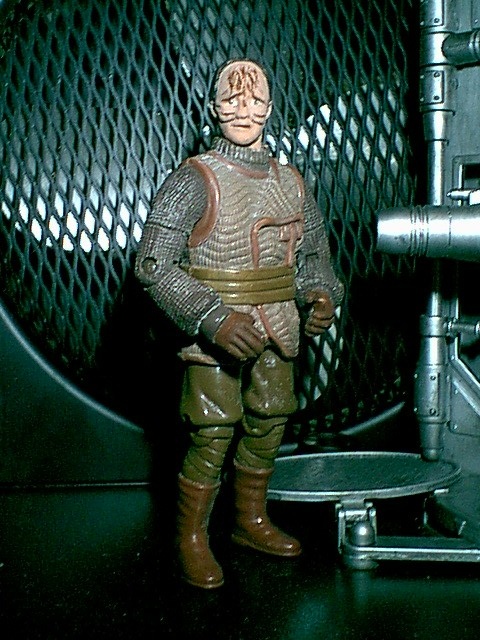
 Also, sometimes the scale of
an object may not be exactly perfect. If it's not of primary importance
in the diorama, don't stress out too much. This is especially true
if you're making a diorama for internet pictures instead of display purposes.
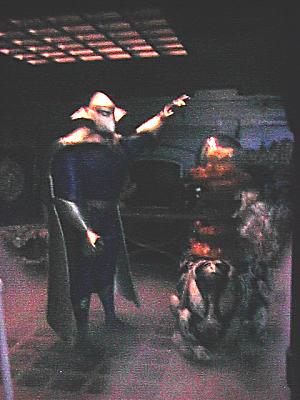
The Starfleet console in my Trek diorama at the right is in a 6" scale, while the Trek
figures I customize are in 5". But when I'm taking pictures, I try to work
around any scale problems. In this example, I put the console
and the figure on different levels, making the scale problem much more difficult
to detect. This is especially true if you're setting up a diorama for taking pictures of
action figures instead of as a permanent display for your abode, because in
action figure photos you probably won't see much of the diorama anyway.
Also, sometimes the scale of
an object may not be exactly perfect. If it's not of primary importance
in the diorama, don't stress out too much. This is especially true
if you're making a diorama for internet pictures instead of display purposes.
The Starfleet console in my Trek diorama at the right is in a 6" scale, while the Trek
figures I customize are in 5". But when I'm taking pictures, I try to work
around any scale problems. In this example, I put the console
and the figure on different levels, making the scale problem much more difficult
to detect. This is especially true if you're setting up a diorama for taking pictures of
action figures instead of as a permanent display for your abode, because in
action figure photos you probably won't see much of the diorama anyway.
-
Verify your Camera settings. I've gone over
this before in my digital photography for action figures article, but I can't
stress it enough. You don't know how many pictures I've taken using the normal rather than macro settings.
This is an area where I can't afford to be flexible; it made my pictures
look horrible. You'll see at least one photo here that got screwed up
because I didn't check my settings.
I.
Chapter 1: Use what you've got!
There's nothing cheaper than something you already
own. Look around your house -- you'll find all sorts of things that
can be used to make a diorama. Look in the kitchen. Look in your
sister's closet. If your house is like mine, you've got a lot
of junk hidden away. The trick is seeing what you might be able to
turn into a new treasure.
Also,
always keep your eyes open. Sometimes that Tupperware lid can mimic a starship wall if it's turned the right way and viewed from the right
angle. When you look for stuff to use in your dioramas, look at it
from various angles, from up close and from far away. You'd be surprised
at how different some things look from a new perspective.
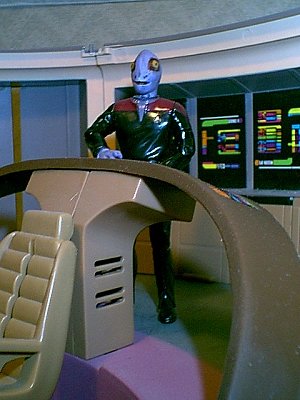
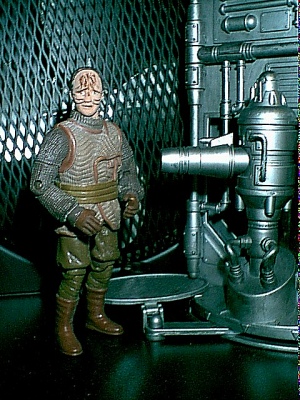
In the previous photo (above), the wall behind my
Saurian is a Tupperware-type lid, the adjacent wall is the bottom of a
small electric heater, the base he's standing on is from the Star Trek Captain/First
Officers boxed set, the console is an accessory from the 6" Dax, and the
floor is... well, I don't know, but it looks like some kind of metal grating/speaker
cover. I found it in the storage room at work, and the boss said
I could have it, so I snatched it up for dioramas.
But you want to see more pictures, don't you. so
let's look at a different example.
Project: Jungle/Swamp
|
PARTS USED
|
COST
|
| Live Plants |
FREE (already owned them) |
| Fake Plants |
FREE (from defunct fish tank) |
| GI Joe Signs & Accessories |
FREE (remains of Chip's childhood) |
| Mayan statue |
FREE (found around my house) |
| Fishtank backdrop |
FREE (from defunct fish tank) |
| Green Felt |
FREE (bottom of a lapboard) |
|
TOTAL
|
FREE
|
MY Cost Sheet for Jungle/Swamp Project
 With
this diorama, I literally spent nothing... expect a few hours scouring
my house looking for appropriate stuff. After gathering a few items,
I arranged everything and started taking photos. You'd be able to see how
these things were arranged if not for the blurry photo on the right -- remember
what I said about verifying your settings?
With
this diorama, I literally spent nothing... expect a few hours scouring
my house looking for appropriate stuff. After gathering a few items,
I arranged everything and started taking photos. You'd be able to see how
these things were arranged if not for the blurry photo on the right -- remember
what I said about verifying your settings?
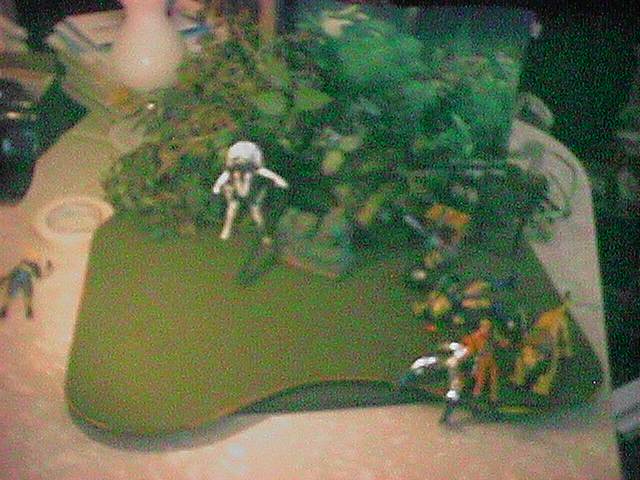
Let me describe what you're seeing in this blurry photo. I started with
the bottom of a lapboard because it's green felt would nicely mimic ground
cover. Next, I placed a few of my houseplants in the rear of the scene,
and I filled in a few gaps in the greenery with some fake aquarium
plants. After taking a few photos I realized that I could still see
too much background through the gaps in the greenery, so I propped up a fish tank
backdrop to add to the background forest clutter. Then I got my camera close enough to cut out
any other offending background and took some pictures. A lot of
pictures. Since I was using a digital camera I took as many pictures as I
could, hoping that out of the 20 to 30 taken with any one diorama I'd get lucky
with a few of them. I think I did.


II.
Chapter 2: Search for bargains everywhere!
Keep your eye open. Bargains can be found
at auctions, yard, tag or estate sales, flea markets, or even clearance
sales at regular-priced stores. Discount stores like the Dollar Tree
and Big Lots also offer nice custom-diorama fodder. We acquired most all
of the buildings I use in my dioramas in these ways.
Chip's dad found a Ghostbusters Firehouse 3-story building playset at
an auction and bought it for his grandkids. Well, I found it
first and made sure Chip claimed it for our action figures :-), and it has served as an excellent backdrop for many of
my urban crime fighters. Also, right after Christmas that same year I found the Gotham
City Bank playset on sale at WalMart marked down to $7, and I couldn't pass it up.
Soon after, Chip found Wayne Manor at a yard sale for $2!!! So now, I can butt these buildings together, along side the BTAS
Villains boxed set (which has the facade of the Gotham City Police Department on
it), and I've got a very good sized city block for my figures to pose in
front of.
-
Get other people involved in your hunt. If
you have parents, friends or relatives who frequents auctions, flea markets
or yard sales, let them know what sorts of things to be looking for.
Sending someone out with instructions to buy cheap action figure playsets
can result in very interesting finds. I didn't even know that the
Ghostbusters Firehouse existed until Chip's dad brought it home.
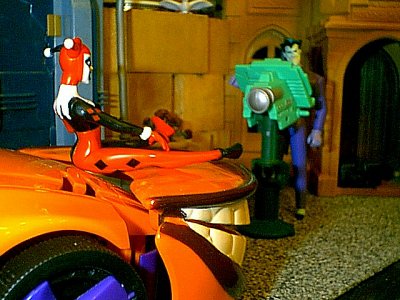
Project I -- City Street
|
PARTS USED
|
COST
|
| Ghostbusters Playset |
FREE (gift from Chip's dad -- found
at auction) |
|
Gotham Bank Playset & accessories
|
$7 (found at Walmart on clearance) |
| Wooden tires, barrels, planters and such (required
painting) |
$2 (found
at FleaLand @ 50¢ each) |
| Box from B:TAS Rogues Gallery set |
FREE (well, I already owned it) |
| Various GI Joe accessories |
FREE (from Chip's childhood) |
| Shingles |
FREE (found scattered around my yard after Spring Storm '98) |
| Other accessories (crates, etc) |
FREE (accessories from other toys
I'd already bought for custom fodder) |
|
TOTAL
|
$9
|
Cost Sheet for City Street Project
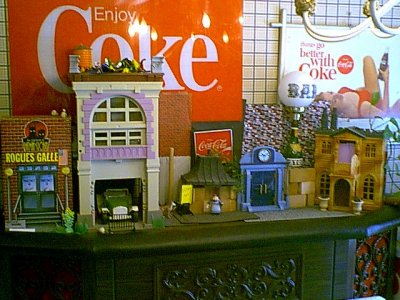 Here's
our city street diorama as it's currently set up. The city remains on
display on this groovy bar year-round. Hey, ya never know when the urge
to take pictures will strike. Plus, when not taking pictures we have a
place to display
customs.
Here's
our city street diorama as it's currently set up. The city remains on
display on this groovy bar year-round. Hey, ya never know when the urge
to take pictures will strike. Plus, when not taking pictures we have a
place to display
customs.
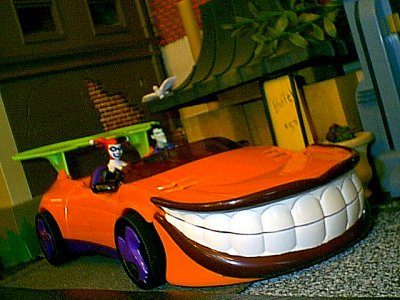
From left to right: Adventures of Batman & Robin
Rogues Gallery boxed set; Ghostbusters fire house playset; alley way, made
from cardboard, flea market finds and action figure accessories; Chinese
restaurant, made from the top of a porch light and building blocks; Gotham
City Bank playset; more blocks disguising our bar light; and the Wayne Manor
playset, flanked by small wooden planters with a 6" Swamp Thing's
alternate rose hands for flowers. The street itself is made of shingles,
which I think look somewhat like asphalt when photographed underneath action
figure feet.
Here are some images of our city street in action.


III.
CHEAP RULE #3: Put your computer to work
Sometimes you want your figures in scenes that are just
a bit beyond your ability to build. I had such a dilemma when I finished
my Green Lantern Corps. While I could have posed them in my city, I knew
that I wanted to put them in space. I decided to put my computer skills to
use and create the space scene the GLC needed.
While I'm not going to try to teach any computing skills
here, I want to mention ways that you can use them to make your dioramas better.
With a scanner, a color printer, some time, skill and ingenuity, you can
create very nice backgrounds for your figures. And if you want to get into
digital image manipulation, you can literally insert your figures into any
background imaginable. While that can produce some interesting effects, I'm going to stick to the method I've used more often --
photographing in front of paper scenery.
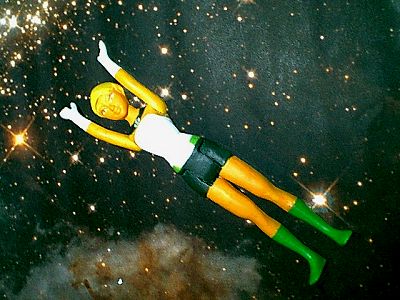
GLC in Space
|
PARTS USED
|
COST
|
| Hubble Space Telescope Photo from NASA website (printed out on color
printer) |
FREE |
|
TOTAL
|
FREE
|
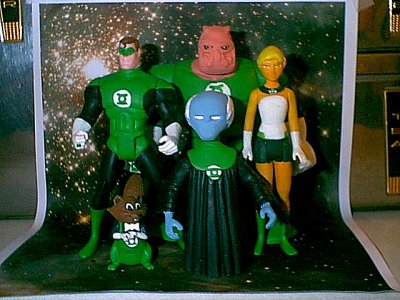

The above photos show one of my favorite methods for extending
the possibilities of my dioramas. I knew I wanted my GLC in space, but I
didn't know how I'd do it until Chip's sister got married last year.
While watching the photographer work, I noticed the background he used was
rolled out like a movie screen, but was long enough so that it covered the floor
on which the happy couple stood. I knew instantly that with some practice
I could use the same technique with my figures.
I surfed over to the NASA website and downloaded a few large
scale images from the Hubble Space Telescope -- something cosmic but not too
recognizable. Then, I printed the image using my color printer.
Finally, I taped the top of the page to the wall (or canisters, as the case may
be) and then stood my figures on the bottom half of the image. After
cropping out my kitchen, I was left with heroes in a starfield, with less
computer work than would be required to digitally composite the two images.
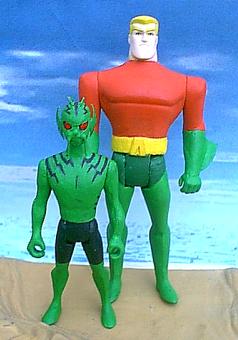 One
problem I had to overcome was shadows. It wasn't a huge problem with my
GLC because the background was rather dark anyway, but with my Aquaman/Lagoon
Boy picture (Tatooine base, computer generated ocean and sky on paper behind),
the light colors meant that any visible shadows would blow the illusion that the
figures were really standing on the beach. My solution -- an old standby
from the days before I had a digital camera w/ flash -- take the pictures
outside, away from direct sunlight. Outdoors, as long as the sun isn't
directly shining on you, shadows aren't nearly the problem that they can be
using flash photography.
One
problem I had to overcome was shadows. It wasn't a huge problem with my
GLC because the background was rather dark anyway, but with my Aquaman/Lagoon
Boy picture (Tatooine base, computer generated ocean and sky on paper behind),
the light colors meant that any visible shadows would blow the illusion that the
figures were really standing on the beach. My solution -- an old standby
from the days before I had a digital camera w/ flash -- take the pictures
outside, away from direct sunlight. Outdoors, as long as the sun isn't
directly shining on you, shadows aren't nearly the problem that they can be
using flash photography.
IV. Chapter 4:
Finally! Taking Photos
Setting up your figures
Now that you've got someplace cool to display those
figures, you can take pictures of them in their neat new locales for your
webpage (you did intend on sharing your creations with the rest of us, didn't
you?). Before you just grab the camera and start clicking, though, there are some
things you should consider.
First, it will help if you are fairly
comfortable using your camera, especially with using most of the settings (while
I'm not going to teach camera usage here, I have written an article on
"Taking Digital Photos of Action Figures" where I discuss digital
camera usage issues; for a much more detailed course on taking photos, I suggest
http://www.agfaphoto.com/library/photocourse/index.html).
OK, take a good look at your figure. A GOOD
look. A CRITICAL look. Is there a small ding in the leg
where you didn't get it sanded all the way down? Does the right eye look
better than the left eye? Is there paint wearing away where you
accidentally rotated the left shoulder? Make mental note of these things,
and use this knowledge when you pose your figures. There's no reason you
can't turn your figure's bad side away from the camera. Or if you're
photographing several figures together, there's no reason that someone's flaw
can't be hidden by another figure standing in front of him or her.
Setting up the layout for your pics can be one of the
most critical areas for getting good photos, and that leads us directly to....
Composition
Composition refers to the overall layout and design of
your scene. Sure, you could simply stand the figure in a row in front of the
diorama (I do that often myself, especially when I want to emphasize the
simplicity of my animated figures' lines), but straight-standing figures can
look awfully boring after a while. Why not pep it up by altering the
composition of the photo? This is something that I really can't quickly
teach you how to do in a short amount of space, but hopefully by showing some
examples and making some suggestions, you start to have ideas of your own.
Set the figure down in the diorama where you think it
would look nice. Now take a look through the camera, but don't take that
picture yet. Use your viewfinder/LCD panel to imagine how the overall
image will turn out. Since your figures aren't going anywhere, take your
time to make sure all the details look pleasing together. Make note of
shadows which might cover important details in your figure. Make note of
how the diorama looks behind the figure. Make note of particular details
in the diorama that you might want to spotlight, and then look at how well your
figure's placement accentuates or distracts from this detail. If you can't
see all the details you want, make note of other angles from which you might get
a better shot.
If you want your pictures to seem like they were literally pulled from an
action figure world, try to crop your photos so that the diorama's edges are
never seen. Even if you're showing off the diorama more so than the
figures, how much would be lost if you got in a little closer so that every inch
of the frame was filled by diorama? Keeping the edges of reality out of
your pictures can make them look cleaner and, oxymoronically, more realistic.


Depending on how large your diorama is, however, this can be a
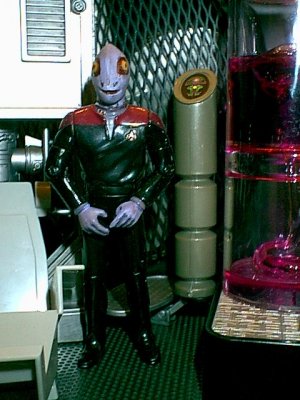
challenge. In the picture of my Saurian officer on the Enterprise bridge,
I really liked how the swoop of the console directed your eye through the
picture, but upon closer inspection I realized that you could see my wallpaper
at the top of the image. After studying it a bit, I ultimately decided
that it wasn't too intrusive and so I kept the picture.
Angles
I've read that the majority of all photos are still taken
at eye-level. Why not shake things up a bit?
 Sometimes you might want to take your pictures from
strange angles. Ever notice
how when artists draw Spider-Man flying on his webbing from building to
building, the backgrounds are often skewed at a strange angle to the center of
focus of the picture? This is because angles, particularly diagonals, can
enhance a picture's sense of tension and motion. Want to make a picture a
bit more active than a simple centered vertical shot? Skew the camera a
few degrees to make things more interesting.
Sometimes you might want to take your pictures from
strange angles. Ever notice
how when artists draw Spider-Man flying on his webbing from building to
building, the backgrounds are often skewed at a strange angle to the center of
focus of the picture? This is because angles, particularly diagonals, can
enhance a picture's sense of tension and motion. Want to make a picture a
bit more active than a simple centered vertical shot? Skew the camera a
few degrees to make things more interesting.
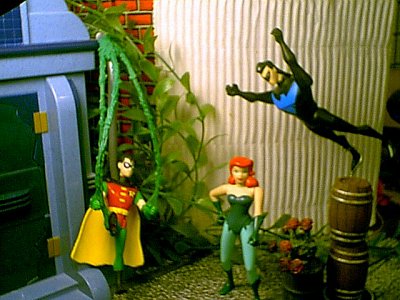
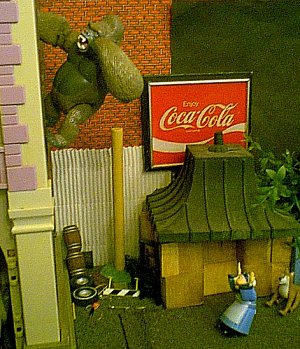
Take this picture of Gorilla Grodd (OK, he's really
Kerchak, but we pretend he's Grodd) scaling a tall building. I like the
way that the woman seems to be cowering back in fear as Grodd scales the
building's vertical face. But let's look at this scene from several
different angles and see why I finally settled on that one.

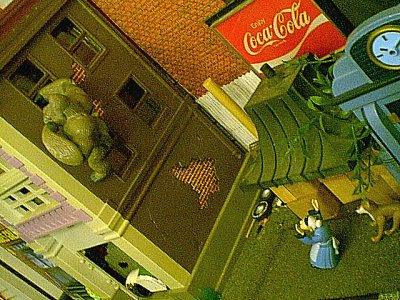
The above pictures are all different variations on the same
exact scene -- nothing has been moved. Notice how the first two, with
their horizontal and vertical layouts, really don't seem like all that much
action is happening. The photos almost seem static, frozen like a
diorama. The next two pictures, taken at skewed angles, display much more
action, but I didn't choose them as my final image either. The third
picture came out quite nicely and displayed the scene pretty much as I'd
imagined it, but I was disappointed that I couldn't see more of the
building. The fourth picture shows off the building fine, but you're
seeing Grodd from behind. And since he's the center of the action, I
wanted to see his face.
Here's
another example of how angles can affect the outcome of a photo. This
image of Rufuss, a friend's RPG character, was taken from a very high
angle, almost over the shoulder of the old woman. I like this image a lot,
and I think the angle lends to the tension of the fight they're having.
Notice there are almost no horizontals or verticals in this image -- only
diagonals. Diagonal lines tend to cause tension in photos.
One other think I especially like about this image is
the way the plant spills over into the frame. The plants, while close up,
adds a sense of depth to this photo that none of my other images of this scene
had.
 This
image looks quite different when compared to one which was taken at a more
centered eye-level angle, yet the figures haven't moved an inch. The only
difference is the angle from which they were taken. Which photo do you
think shows more tension?
This
image looks quite different when compared to one which was taken at a more
centered eye-level angle, yet the figures haven't moved an inch. The only
difference is the angle from which they were taken. Which photo do you
think shows more tension?
Here are some more examples of pictures which use diagonals and strange
angles to increase motion or tension in the picture.
Balance
Another thing to consider when laying out the
composition of your diorama is balance. Simply put, your images will be
more pleasing if there is balance throughout the picture. Are the elements
in your photo weighted similarly throughout? Check out the two photos
below. The first one features a decent shot of my Star Trek Pakled, but
the picture is too heavily balanced to the right. There's a heavy piece of
machinery on the right, the figure is in the center, but the left side is fairly
empty. This makes the image almost seem like it's going to topple over
towards the right.
The second image, however, has shifted the center of
attention slightly so that the Pakled takes up the left hand side of the image
while the machinery fills the right. This helps better balance the photo,
making it feel more like it's not going to fall over. This off-centered
balance works quite well when there's an element
in your diorama that you want to show off, perhaps an element which ties in
nicely with the figure (such as the machine above, which sharp-eyed readers will
recognize as the accessory that comes with X:Men: Evolution's Nightcrawler).
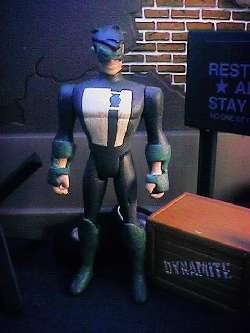
Color
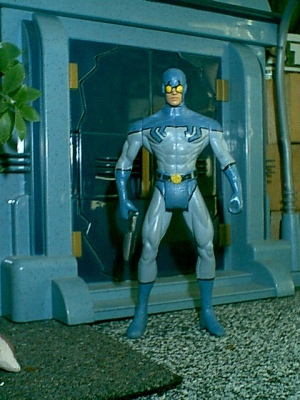
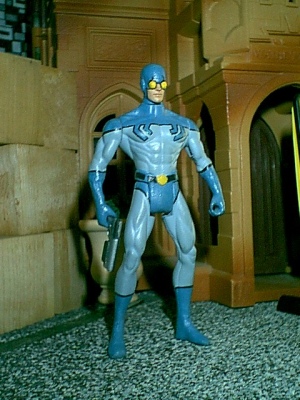 If you're going to be taking pictures of
Blue Beetle, you
should note that he won't show up as well in photos if it's taken in front of a
blue diorama. The blue of the figure can blend in with the background,
making him almost disappear. He's stand out much better against something
a bit more contrasting. But be careful, because
if a figure stands against a background that is of completely contrasting colors
or pattern, it can come out looking garish. It's important when choosing where
to photograph your pictures to consider how the figure looks against the
background color or pattern.
If you're going to be taking pictures of
Blue Beetle, you
should note that he won't show up as well in photos if it's taken in front of a
blue diorama. The blue of the figure can blend in with the background,
making him almost disappear. He's stand out much better against something
a bit more contrasting. But be careful, because
if a figure stands against a background that is of completely contrasting colors
or pattern, it can come out looking garish. It's important when choosing where
to photograph your pictures to consider how the figure looks against the
background color or pattern.
Mood
 Mood can be tricky to alter in photos of action
figures, especially if you're primary intent is to show off your figures to the
world. The diorama in which you plan to take the photo probably have
the greatest impact on the mood, but there are other elements, such as the
previously mentioned camera angles, as well as lighting and special effects, that can enhance
the mood. Looking at my example on the left, Dr. Fate looks much
mysterious working his magic with the lights turned down a notch, with a
magical mist in the air, and with a eerie spotlight coming through his
skylight.
Mood can be tricky to alter in photos of action
figures, especially if you're primary intent is to show off your figures to the
world. The diorama in which you plan to take the photo probably have
the greatest impact on the mood, but there are other elements, such as the
previously mentioned camera angles, as well as lighting and special effects, that can enhance
the mood. Looking at my example on the left, Dr. Fate looks much
mysterious working his magic with the lights turned down a notch, with a
magical mist in the air, and with a eerie spotlight coming through his
skylight.
Also, try using accessories to strengthen the mood of your
figures. If you've purchased as many figures as we have, you
probably have a box-load of accessories somewhere. Go through it and pick
out anything that might be useful in your dioramas. Dr. Fate's lair
was accessorized using a variety of action figure accessories. Sure, most
of them didn't show up in the final photo, but that's not the point -- they add
to the atmosphere, the mood. Besides, if you're like me, when you're
trying to take moody shots you're never quite sure what's going to come out and
what's not.
We've already talked about one way to change the mood of your photos -- vary
the angles, which can add tension or simulate action. So lets move on
to...
Lighting & Effects
 You can't very well show off your figures if they're so
dark as to be virtually hidden in the shadows. But sometimes you
want your figures to be displayed in a bit darker setting. While
it can be hard to balance the amount of light to get the right mood and still
get a visible photo, the effort is worth it.
You can't very well show off your figures if they're so
dark as to be virtually hidden in the shadows. But sometimes you
want your figures to be displayed in a bit darker setting. While
it can be hard to balance the amount of light to get the right mood and still
get a visible photo, the effort is worth it.
This picture of Green Lantern was taken using a black
light because the figure is painted with glow in the dark spray paint. But even
though the glow doesn't really show up in the photo, the black light helped cast
an eerie nighttime pallor across the image, creating an interesting
effect.
 Special
effects can also be achieved using smoke or dry ice. I've used both, and
they handle fairly differently. Smoke has a tendency to rise upwards,
while dry ice fog tends to flow downward. But used separately or in
conjunction, you an create moody, atmospheric images by simulating fog.
The picture of Silver Banshee on the left was taken using dry ice for the fog,
and the image was shot at a slight angle. Looking back, the angle should
have been a touch sharper. That's something I'll try to fix the next time
I play with dry ice.
Special
effects can also be achieved using smoke or dry ice. I've used both, and
they handle fairly differently. Smoke has a tendency to rise upwards,
while dry ice fog tends to flow downward. But used separately or in
conjunction, you an create moody, atmospheric images by simulating fog.
The picture of Silver Banshee on the left was taken using dry ice for the fog,
and the image was shot at a slight angle. Looking back, the angle should
have been a touch sharper. That's something I'll try to fix the next time
I play with dry ice.
Another photo I've done using dry ice is Dr. Fate's
mystic lair, above. That image was more challenging because in addition to
the fog issues -- the setting featured flooring grates into which all the dry
ice fog fell -- I also had lighting issues as well. I knew I wanted the
major light in the scene to come from the skylight above Dr. Fate. But
reaching a balance of light through the skylight with ambient light making the
scene actually visible was difficult indeed. In order to balance all the
issues involved, I had to have several helpers holding lights, pouring fog and
blowing smoke.
For me, setting up and photographing my customs are almost as much fun as
making them -- perhaps more so, since this part is sorta like play. And if
you're into toys as much as I am, you've got to be a big kid at heart. I
hope I've been able to give you some pointers on how to make your action figure
photos better through the usage of dioramas. If you'd like to see more of
my figures and pictures, check out Chip'd
n' Stone Customs.
 Also, sometimes the scale of
an object may not be exactly perfect. If it's not of primary importance
in the diorama, don't stress out too much. This is especially true
if you're making a diorama for internet pictures instead of display purposes.
The Starfleet console in my Trek diorama at the right is in a 6" scale, while the Trek
figures I customize are in 5". But when I'm taking pictures, I try to work
around any scale problems. In this example, I put the console
and the figure on different levels, making the scale problem much more difficult
to detect. This is especially true if you're setting up a diorama for taking pictures of
action figures instead of as a permanent display for your abode, because in
action figure photos you probably won't see much of the diorama anyway.
Also, sometimes the scale of
an object may not be exactly perfect. If it's not of primary importance
in the diorama, don't stress out too much. This is especially true
if you're making a diorama for internet pictures instead of display purposes.
The Starfleet console in my Trek diorama at the right is in a 6" scale, while the Trek
figures I customize are in 5". But when I'm taking pictures, I try to work
around any scale problems. In this example, I put the console
and the figure on different levels, making the scale problem much more difficult
to detect. This is especially true if you're setting up a diorama for taking pictures of
action figures instead of as a permanent display for your abode, because in
action figure photos you probably won't see much of the diorama anyway.