NORMAL setting on |

MACRO setting on |
Digital cameras have several nice features to offer today's computer user, chief among which are price & convenience. Sure, a digital camera might initially cost more than a generic point-and-shoot film-based camera, but unlike that film-based camera, your initial investment is all that is required to begin and continue taking pictures for a very long while. Neither film nor developing is required, which is a big plus not only from a price standpoint, but also a convenience one you can view your pictures immediately after you shoot them.
Unfortunately, price and convenience almost seem to eclipse quality as a key selling feature of these cameras. Sure, digital cameras with superior quality exist, but the price on them isnt so customer-friendly. Honestly, have you ever overheard someone saying, "Oh yeah, Im gonna go get one of those cheap digital cameras they take such good quality pictures." If, like me, price is your big concern, you may be afraid that youll never get great pictures of your action figures.
Well, last year my office bought a relatively cheap digital camera. Now, one year, some advice, and much practice later, Ive finally started feeling both satisfied and confident in the pictures Im taking with it. And now, I want to share what Ive learned so far, so that others can benefit from my year of making mistakes.
For those interested, the brand name/model number of our camera
Casio LCD Digital Camera QV-120.
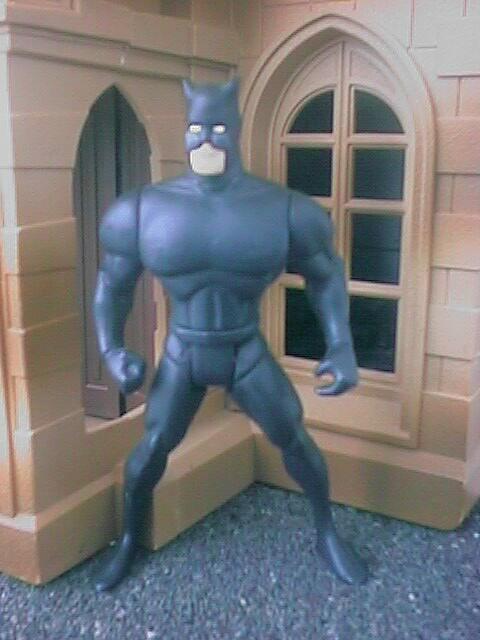
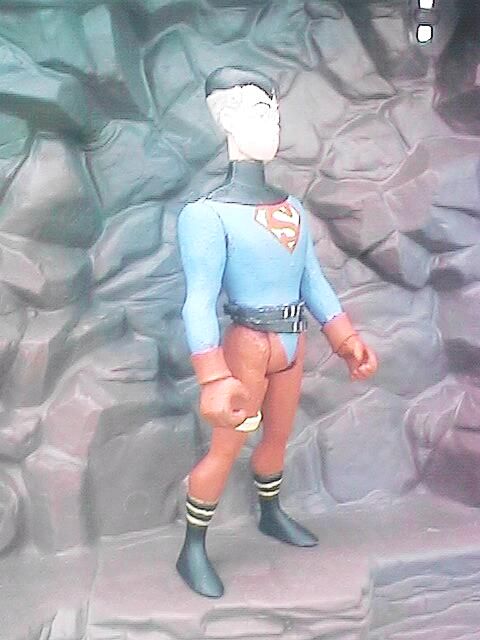
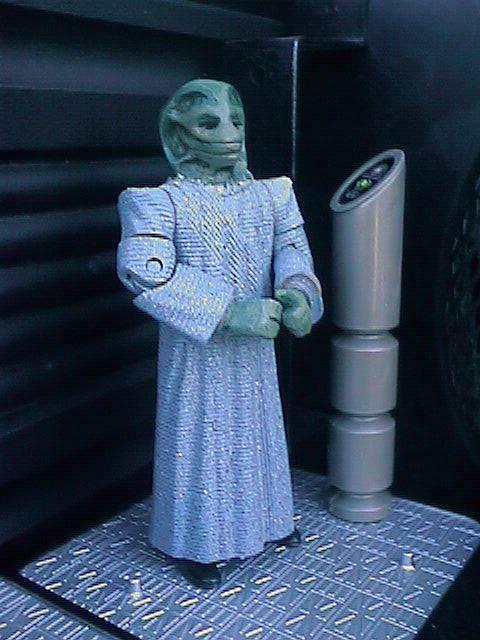
Focus: MACRO/NORMAL
Since I have an "autofocus" camera, this is probably the most important
setting I've got. As I understand it, this button switches the cameras
focus onto something either near (MACRO) or far (NORMAL). Use MACRO
when photographing anything close to the camera. For me, this has
included every clear close-up shot of an action figure Ive taken.
|
NORMAL setting on |
MACRO setting on |
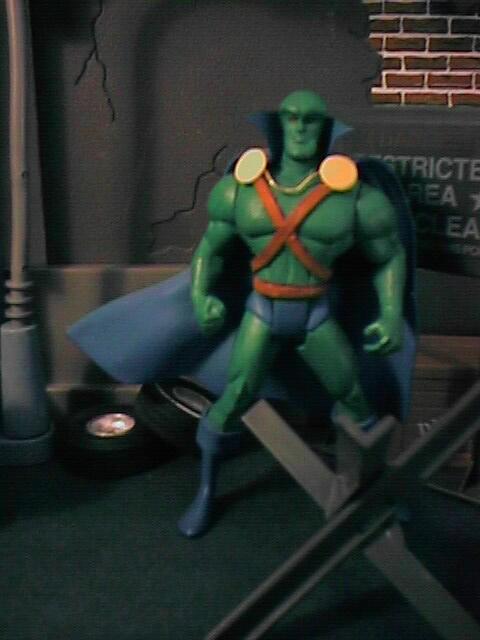
Resolution: FINE/NORMAL
Although I'll admit Ive taken a few good pictures in NORMAL mode,
Ive taken many better ones in FINE mode. FINE mode on my camera
(remember, yours may be different) produces pictures at 640 x 480 pixels,
whereas NORMAL mode produces pictures at 320 x 240 pixels. Although
the FINE mode pictures have been too large for most of my uses, Ive found
that in the process of reducing the size of the picture, some very small
dings or flaws in my figures are masked in the reduction. If you
take pictures in NORMAL mode, you wont likely want to reduce your picture
size, and you cant take advantage of this effect.
Wildcat pic -- lo res |
Wildcat pic -- hi res |
| Maxima pic -- lo res | Maxima pic -- hi res |
|
|
|
Something you might notice from the examples above is that the pictures
taken in Normal mode appear brighter than those taken in Fine mode.
Don't quite know why, and I suppose it could just be my camera, but for
me this means I need even more light when I want to take the highest resolution
pictures possible.
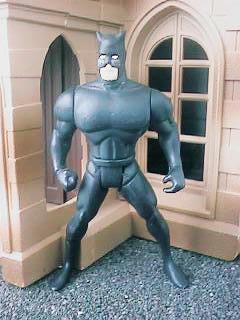
Aperture: OPEN/CLOSED
 This
is one Ive really not had to worry about, mostly because the automatic
sensors on my camera work fairly well and let me know when I need to change
this setting. But just so you know, this should be set on OPEN when
taking pictures inside, in order to allow as much light in as possible.
Outside, the CLOSED setting will help prevent wash-out and glare.
The picture of Wildcat at the right was taken at the same time as all those
above, except the aperture was in the closed position and there just wasn't
enough ambient light outside to compensate (a thunderstorm was rolling
into town).
This
is one Ive really not had to worry about, mostly because the automatic
sensors on my camera work fairly well and let me know when I need to change
this setting. But just so you know, this should be set on OPEN when
taking pictures inside, in order to allow as much light in as possible.
Outside, the CLOSED setting will help prevent wash-out and glare.
The picture of Wildcat at the right was taken at the same time as all those
above, except the aperture was in the closed position and there just wasn't
enough ambient light outside to compensate (a thunderstorm was rolling
into town).
Light: +/-
Although this button is used for many things in various modes on my
camera, while taking pictures it gently adjusts the amount of light entering
the camera. Ive really just started using this feature, but so far
Ive found that its easier to adjust the lighting manually than with this
button, mostly because the way a picture seems lit through the LCD panel
on my camera doesnt always match how it will appear once I have it on
the computer.
LCD Panel
My camera has an LCD panel which can be used as both the viewfinder
and as a playback screen. The color quality isnt great, and the
viewing angle isnt great, either. Therefore, its nice that I have
Camera-to-RCA-Plug Cord
This cord has been very useful by allowing me to view my pictures straight
from the camera onto my TV. The colors and lighting on a TV more
closely resembles what they will look like on the computer screen.
And because Im just viewing the pictures instead of uploading them to
a computer, I get results much more quickly.
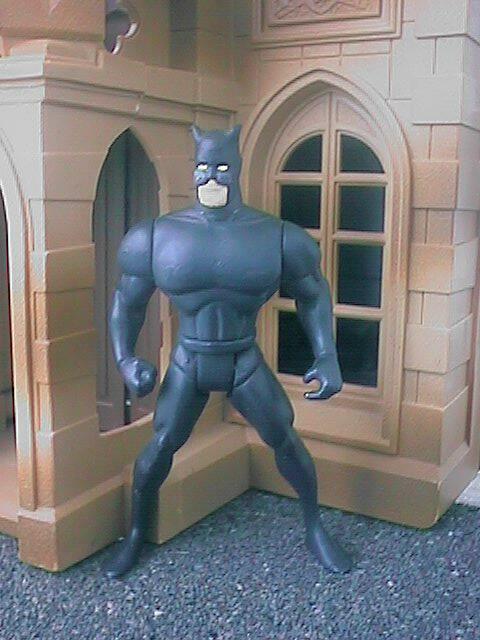
USE MORE LIGHT!!!!
 For
me, the hardest part of taking digital pictures has been getting the lighting
right. So much else really depends on that. So far, almost
every picture Im happy with has been taken outside in the later part of
the afternoon. When I asked for advice on taking pictures, this was
probably the most common answer, with good reason I've learned. With
a digital camera, lighting can be extremely touchy. Outside, Ive
found it best to photograph the figures away from direct sunlight, which
tends to wash out any light colors on the figures (see pic at right).
Late afternoon when the sun is out of direct line-of-sight with your location
is a good time, as well as any "relatively cloudy but otherwise not to
gloomy" day.
For
me, the hardest part of taking digital pictures has been getting the lighting
right. So much else really depends on that. So far, almost
every picture Im happy with has been taken outside in the later part of
the afternoon. When I asked for advice on taking pictures, this was
probably the most common answer, with good reason I've learned. With
a digital camera, lighting can be extremely touchy. Outside, Ive
found it best to photograph the figures away from direct sunlight, which
tends to wash out any light colors on the figures (see pic at right).
Late afternoon when the sun is out of direct line-of-sight with your location
is a good time, as well as any "relatively cloudy but otherwise not to
gloomy" day.
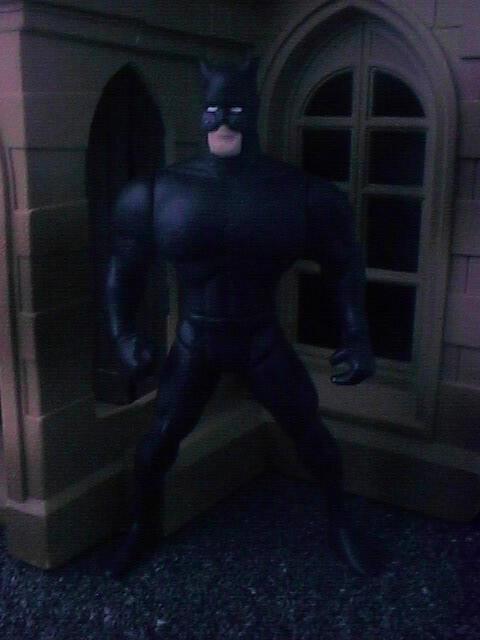
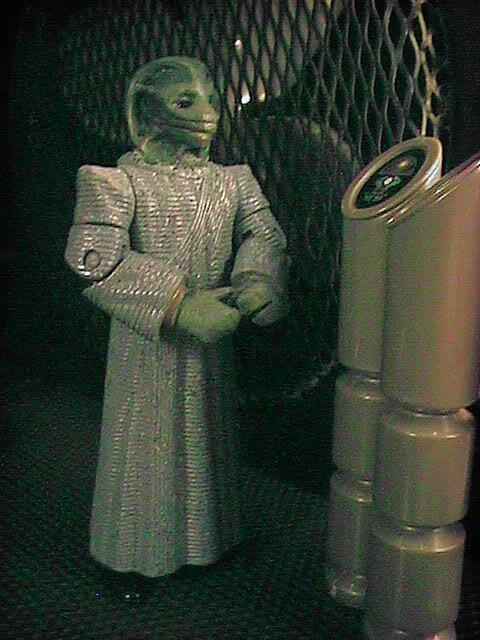
 Indoors,
things get a bit trickier. The picture at left was taken indoors
without enough light. So far, my best pictures indoors have been
achieved almost identically to the ones outdoors, albeit by using the natural
sunlight from windows. Set up your figures in an area which receives
a LOT of sun. I use my dining area, the same place we keep our houseplants.
This area is great for getting excellent sun, but unfortunately, because
of the way the house is located, the lighting is best in the mornings,
so during the winter I had to get up early on the weekends to take pictures
(and I am not a morning person).
Indoors,
things get a bit trickier. The picture at left was taken indoors
without enough light. So far, my best pictures indoors have been
achieved almost identically to the ones outdoors, albeit by using the natural
sunlight from windows. Set up your figures in an area which receives
a LOT of sun. I use my dining area, the same place we keep our houseplants.
This area is great for getting excellent sun, but unfortunately, because
of the way the house is located, the lighting is best in the mornings,
so during the winter I had to get up early on the weekends to take pictures
(and I am not a morning person).
 Some
people have advised me not to use florescent or halogen lights because
they flicker, which can cause your lighting to be unreliable, but so far
Ive actually had decent results under florescents, although the best of
those results have been under several dozen lights. I've also achieved
neat effects using black lights, which can help to create a nighttime effect.
While using the blacklights, I still had to have several other lights on
in the room to have enough light to be able to see.
Some
people have advised me not to use florescent or halogen lights because
they flicker, which can cause your lighting to be unreliable, but so far
Ive actually had decent results under florescents, although the best of
those results have been under several dozen lights. I've also achieved
neat effects using black lights, which can help to create a nighttime effect.
While using the blacklights, I still had to have several other lights on
in the room to have enough light to be able to see.
Also, make sure that you are conscious of your own shadow, as well as
the shadows of anyone else in the area. I had a strange problem once
while taking photos of Star Trek characters. I took all my pictures
with seemingly identical lighting conditions, and yet some came out clear
while others came out very dark and gritty. What I finally realized
was that my roommate Chip was walking around behind me and casting a slight
shadow over my work area. Because we had so much ambient light in
the room, the shadow was almost imperceptible to our eyes. It took
some time (and the equivalent of one wasted role of film) before we realized
that he was the cause of the darkness in my photos. Watch for similar
situations caused by passing clouds, especially if you're taking pictures
indoors.
Selay -- lower light inside |

Selay -- more light inside (w/ bright open windows) |
Selay -- outside in the shade |
Keep that camera still!
By all means, use a tripod if you have access to one; but if you dont,
you may want to find something else to use as a substitute. Over
time, I have collected a few small boxes which are just the right height
to help me prop up my camera and keep it still.
Always verify your settings
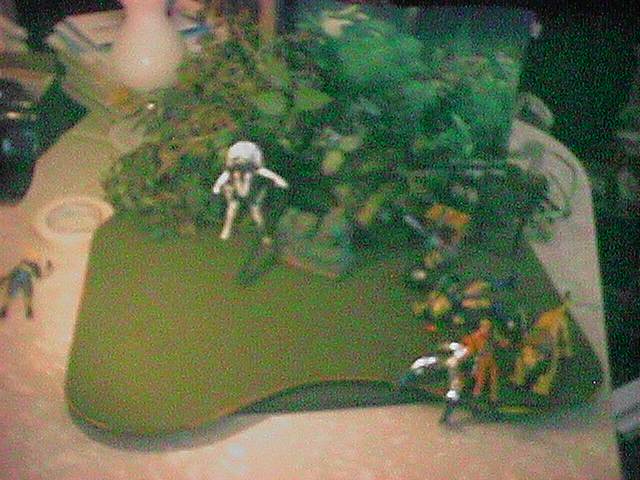 I
cant tell you the number of times Ive filled up the camera's memory,
and then when looking at the pictures on the TV, found that Id taken them
all on NORMAL instead of MACRO. Youll save yourself a lot of pain,
effort and heartache if youll just verify your camera's settings before
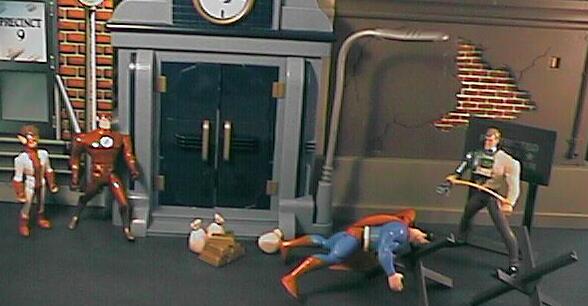
each picture. In the picture at the right, I was trying to show what
my jungle-style diorama looks like from above, but I forgot to change the
focus from MACRO to NORMAL. Duh!
I
cant tell you the number of times Ive filled up the camera's memory,
and then when looking at the pictures on the TV, found that Id taken them
all on NORMAL instead of MACRO. Youll save yourself a lot of pain,
effort and heartache if youll just verify your camera's settings before
each picture. In the picture at the right, I was trying to show what
my jungle-style diorama looks like from above, but I forgot to change the
focus from MACRO to NORMAL. Duh!
Take your time
Take the time to make sure all the details are the way you want them
to be. If you just plop your figure on the table without taking your
time to deliberately place him, you might just take a picture of a figures
bad side. Or you might cover up the details youre most proud of.
Or you might even cast the entire figure in shadow. In the end, youre
pictures will turn out better and you won't have to reshoot if you're careful
to get all the details right the first time.
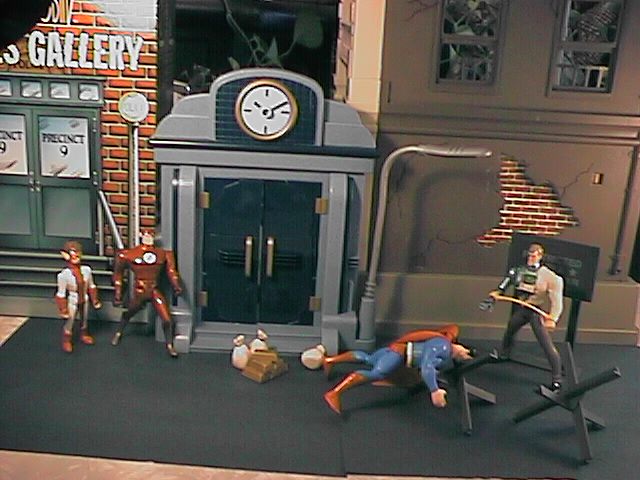
 One
such detail to be careful of is lighting glare. Digital photography
requires a lot of light. Some of the backgrounds I use in my dioramas,
such as the Gotham City Bank and the Gotham City Police Department box,
are a bit shinier than Id like. Therefore, I have to really be careful
where I place light sources in relation to them. Ive taken several
pictures which contained the glow of an extremely bright hurricane lamp
reflecting in the bank door. In the picture on the left, the GCPD
box reflected way too much light, although upon closer inspection, the
glare occurred exactly on a street lamp -- neat, yes, but completely accidental.
One
such detail to be careful of is lighting glare. Digital photography
requires a lot of light. Some of the backgrounds I use in my dioramas,
such as the Gotham City Bank and the Gotham City Police Department box,
are a bit shinier than Id like. Therefore, I have to really be careful
where I place light sources in relation to them. Ive taken several
pictures which contained the glow of an extremely bright hurricane lamp
reflecting in the bank door. In the picture on the left, the GCPD
box reflected way too much light, although upon closer inspection, the
glare occurred exactly on a street lamp -- neat, yes, but completely accidental.
Sure, glare might not completely ruin the picture, but it can hide details
and it does somewhat destroy the illusion that youre diorama is a little
world all in itself. If you can avoid reflections of the real world
in your photos, they will look all the better.
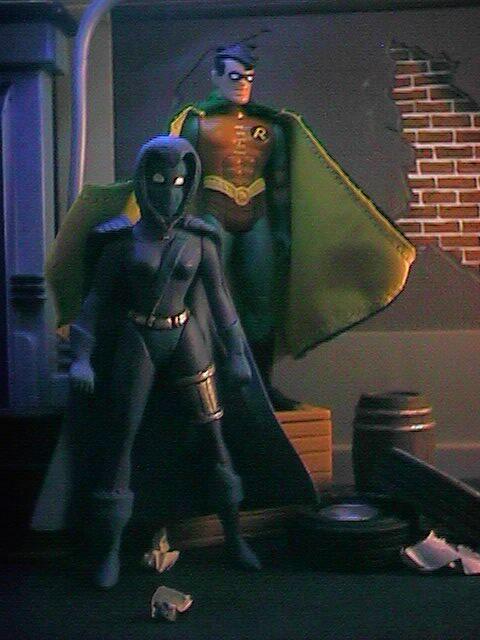
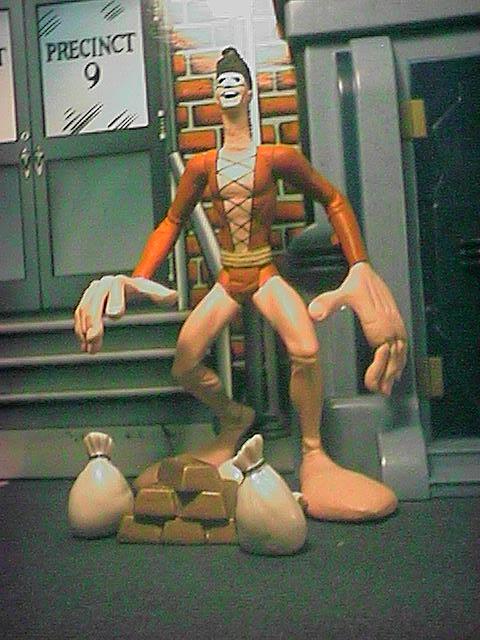
Photograph your figures, not your house
OK, this isn't really specific to digital photography, but it is something
I've come to appreciate because of it. Since I've had the ability
to experiment with countless different setups, I've decided my figures
just look much better when I leave my house out of the picture.
While many of us display our figures on bookshelves (or on computers, or
on tables, etc.), photographs of figures on bookshelves (or on computers,
or on tables, etc.) just aren't always the best way to showcase a figure.
The extra clutter around the figures often competes with and takes away
from the center of attention. Instead of just taking the picture
on the shelf, try to photograph the figure in a diorama. If you can't
build a diorama, take the picture in front of a fairly plain, non-patterned,
non-detailed background.
Fill the frame with the FIGURE, not the background
I know that youve spend a lot of time building that diorama, but if
youre taking a picture to showcase a new custom youve just completed,
then let the diorama be the background, not the focus. Otherwise
youll end up with pictures of a lot of stuff, and oh yeah, you might notice
that theres an action figure somewhere in it, as well. Because my
camera doesn't have any sort of zoom feature, I have to get in very
close
to the figure to completely fill the frame.
And even if you are taking pictures of your diorama itself, dont worry
if you cut off a bit of the edges itll look better than having part
of your kitchen show up in the background. In fact, a diorama is
going to work best if you cannot see where it begins or ends. One
final note about photographing dioramas: if you have to get farther
away to photograph the whole thing, remember to check your MACRO/NORMAL
setting to see which will work better at the new distance.
 picture of diorama with bits of messy kitchen visible in background / table
in foreground
picture of diorama with bits of messy kitchen visible in background / table
in foreground |
 same picture cropped to remove messy kitchen
 |
Dont be afraid to ask questions
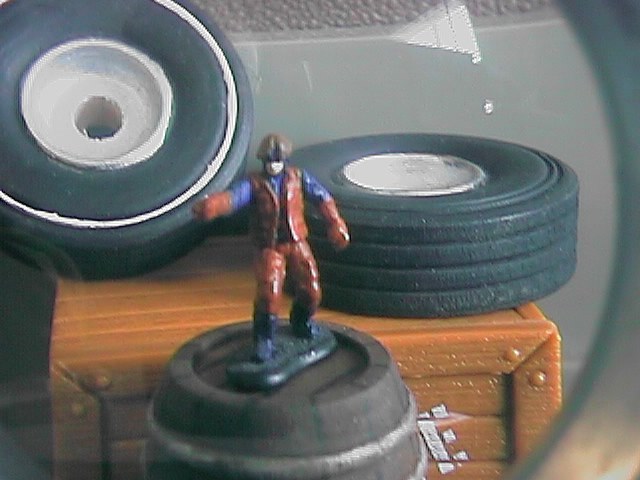 When
taking pictures of VERY small objects, I found that my camera just couldnt
focus tightly enough. And unfortunately my camera did not have a
ZOOM function. But thankfully I have several wonderful resources
available to me -- namely, the members of the customizing listserv -- and
someone there gave me the solution: use a magnifying glass to tighten the
focus. Logistically, its not easy to do if youre only one person
with two hands trying to account for all the glare and lighting problems,
but it honestly worked really well, with just some effort. And I
definitely think the effort was worth it. That's a very innovative
idea I would never had thought of had I not asked.
When
taking pictures of VERY small objects, I found that my camera just couldnt
focus tightly enough. And unfortunately my camera did not have a
ZOOM function. But thankfully I have several wonderful resources
available to me -- namely, the members of the customizing listserv -- and
someone there gave me the solution: use a magnifying glass to tighten the
focus. Logistically, its not easy to do if youre only one person
with two hands trying to account for all the glare and lighting problems,
but it honestly worked really well, with just some effort. And I
definitely think the effort was worth it. That's a very innovative
idea I would never had thought of had I not asked.
Take billions of pictures
My final advice is just to experiment. Take as many pictures
in as many different set ups as possible. And while you're doing
it, learn from your experiences. Notice what you like and what you
don't. One of my favorite features of the digital camera is the fact
that there is no film to be developed. You can take as many
pictures as you want, upload them all to your computer, and then start
again. I'll all but guarantee that if you practice and pay attention to
what works and what doesn't, you're pictures will improve. After
all, mine did.