How to Save a Works File as a Word File
1. Type your document completely in Works or open it if already saved in Works format. When you go to save the file, you will save it as a Word file. To do this, you will first click on the word "File" in the upper left corner of your screen. See figure 1 below.

Figure 1
2. This will present you with a drop down box which looks similar to figure 2 below.
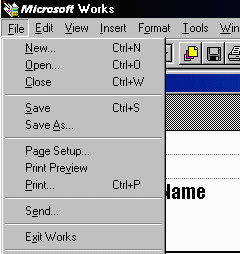
Figure 2
3. Next click on the words "Save As". This will present you with a pop-up box which will look similar to figure 3 below.
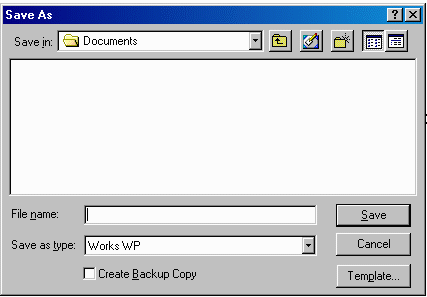
Figure 3
4. Find the line in the pop-up box which says "Save as type:" [you will see the default is Works WP]. At the right hand corner of the box is a small down-arrow button. Click on this button which will present you with another drop-down box similar to figure 4 below. You may have to scroll either up or down to see all of the choices.
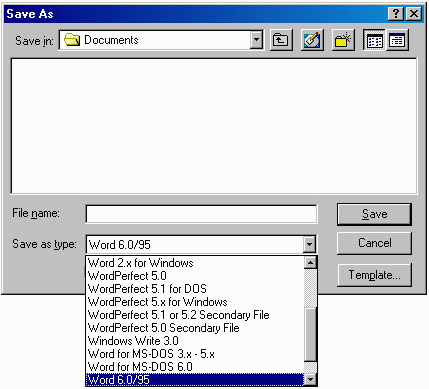
Figure 4
5. You can select either "Word 6.0/95" or "Word for Windows (Generic)" as seen in figures 5 and 6 below. This will save the file in a format that can be read by Word. Be sure to enter a file name in the box labeled "File name" as indicated in figure 6, then click the "Save" button.
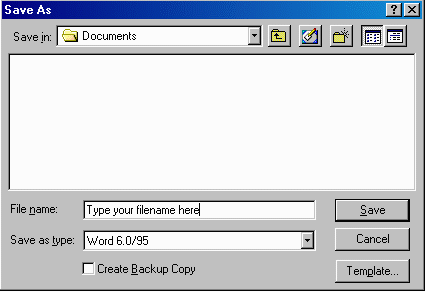
Figure 5
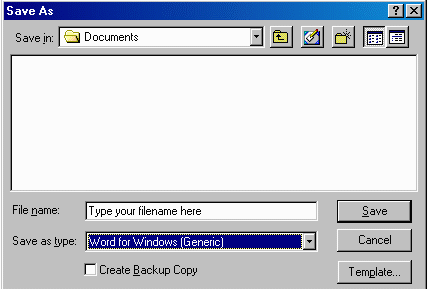
Figure 6
6. Once your file is saved, it should have a ".doc" extension if it is in Word format. For example, it should be -- termpaper.doc -- if you named the file termpaper. If it has a .wps extension (termpaper.wps) this is a Works file and is not the correct format. You can tell what extension it has when you attach it to an email message -- the entire name will show up on the message before you send it. If it has a .wps extension, don't bother to send it because it can't be read in Word. Go through the process again and save it as a Word document. If you have any problems or concerns, contact your instructor.