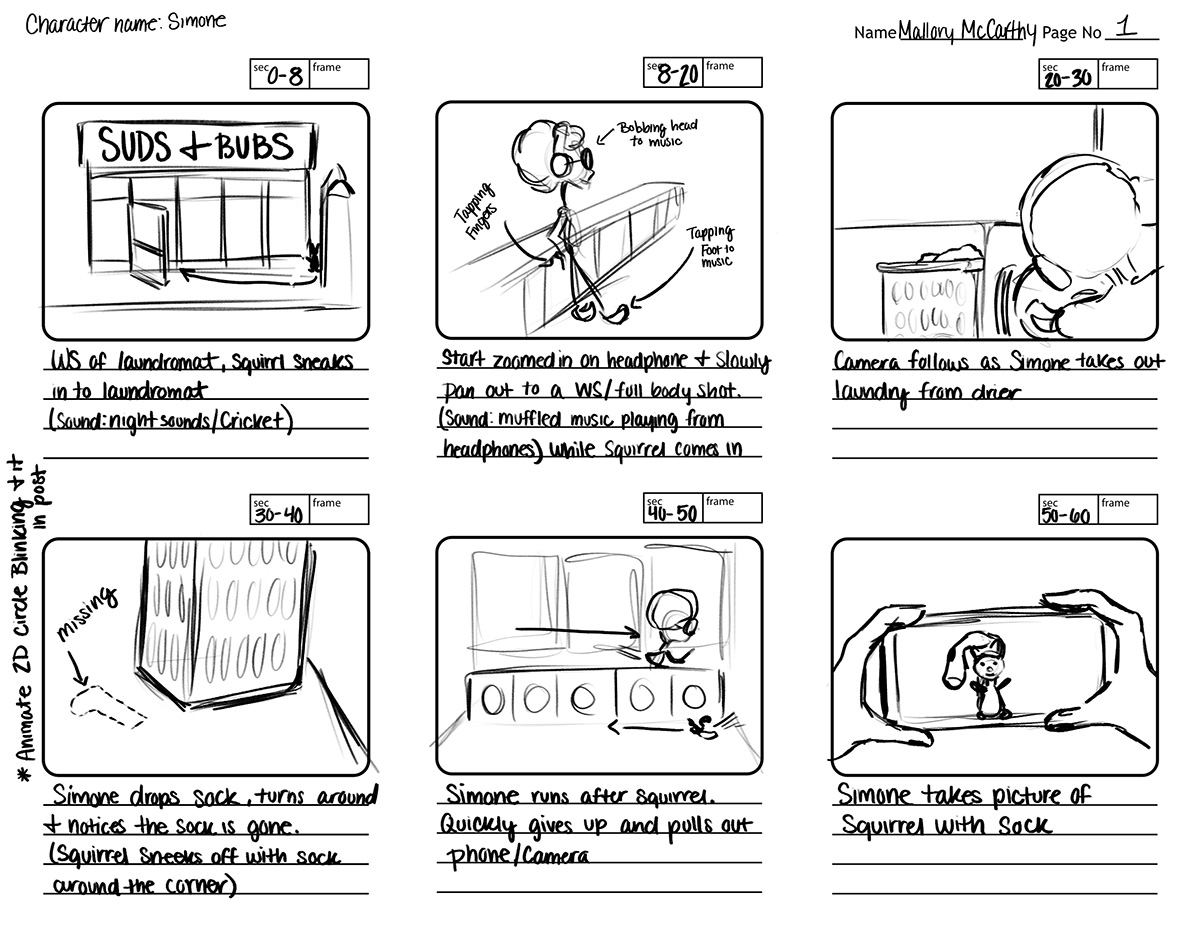
Project Info.
- Title:
- Brief Synopsis (description):
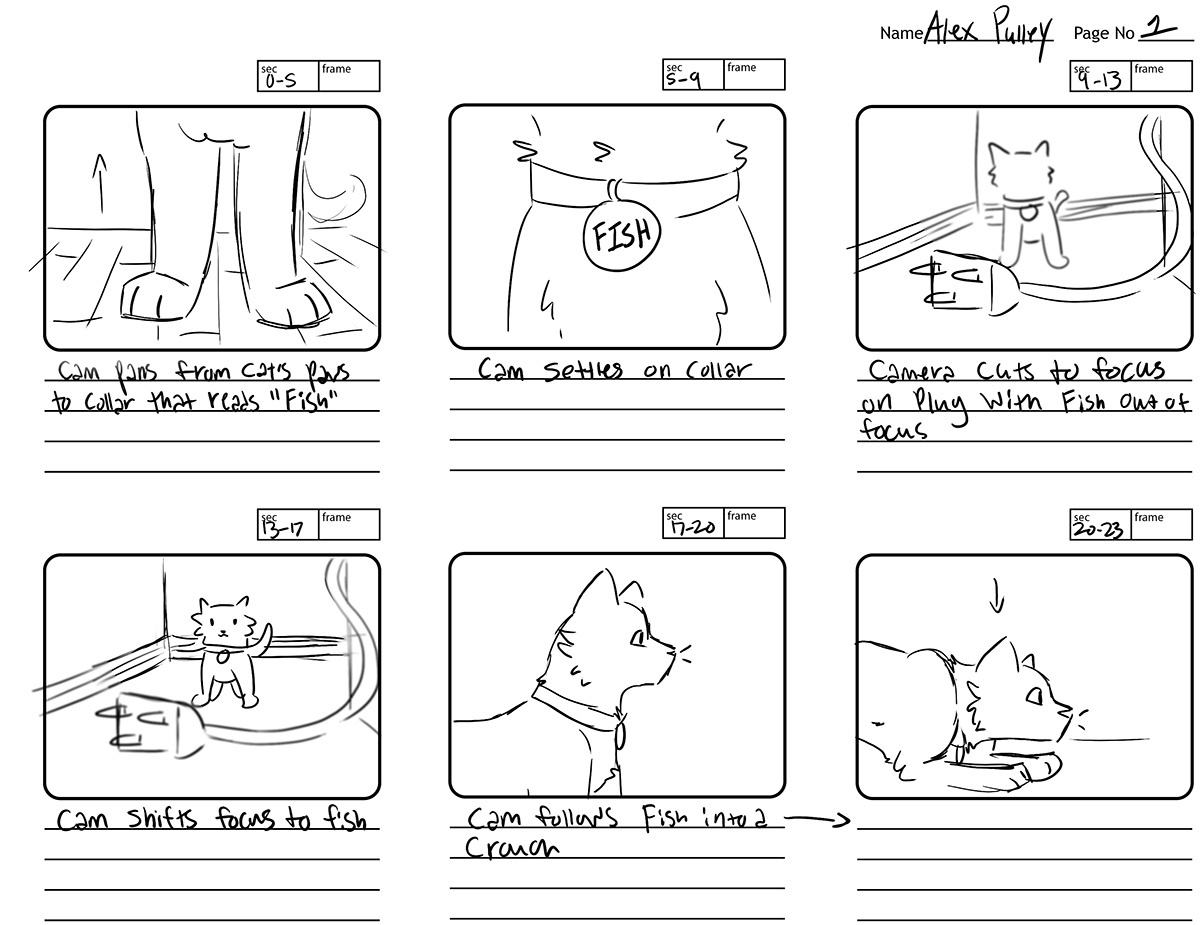
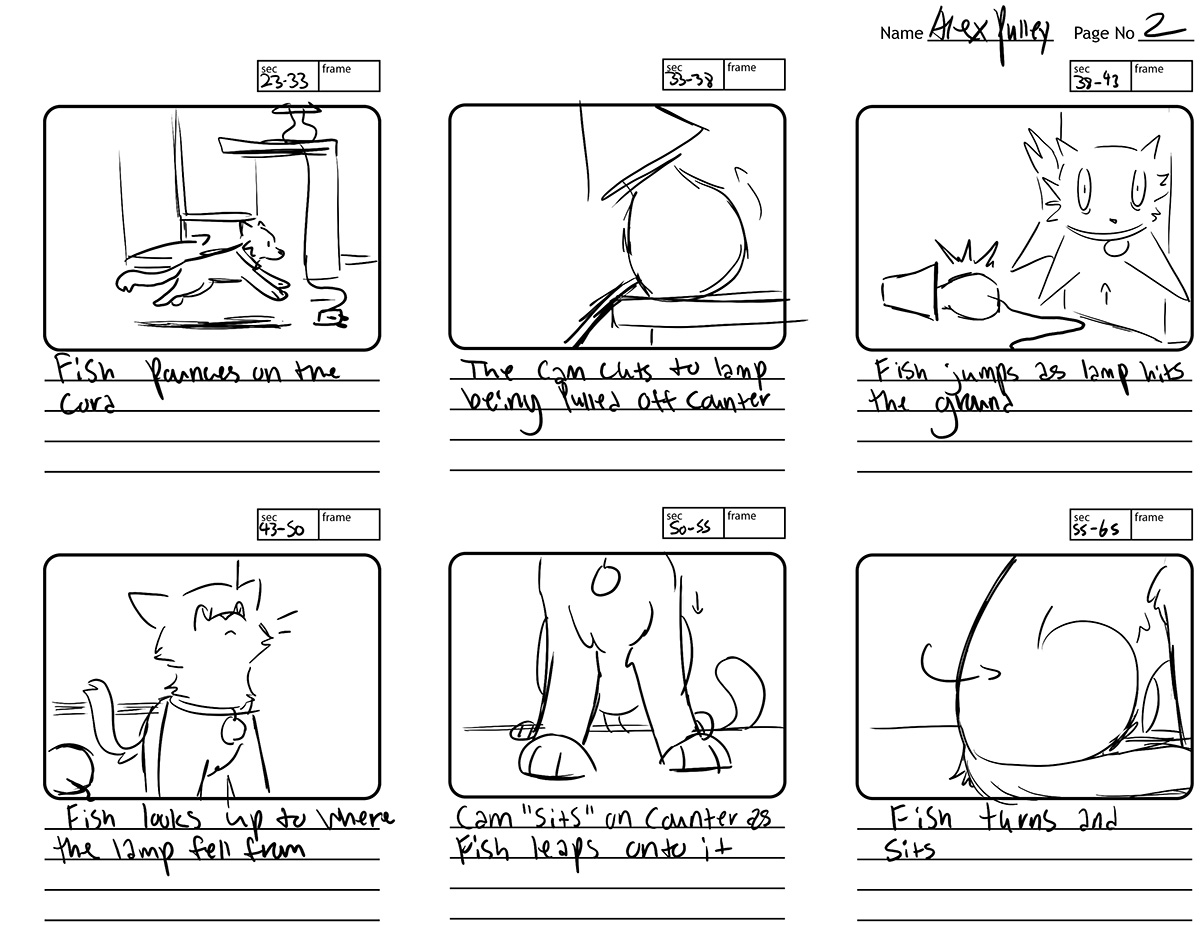
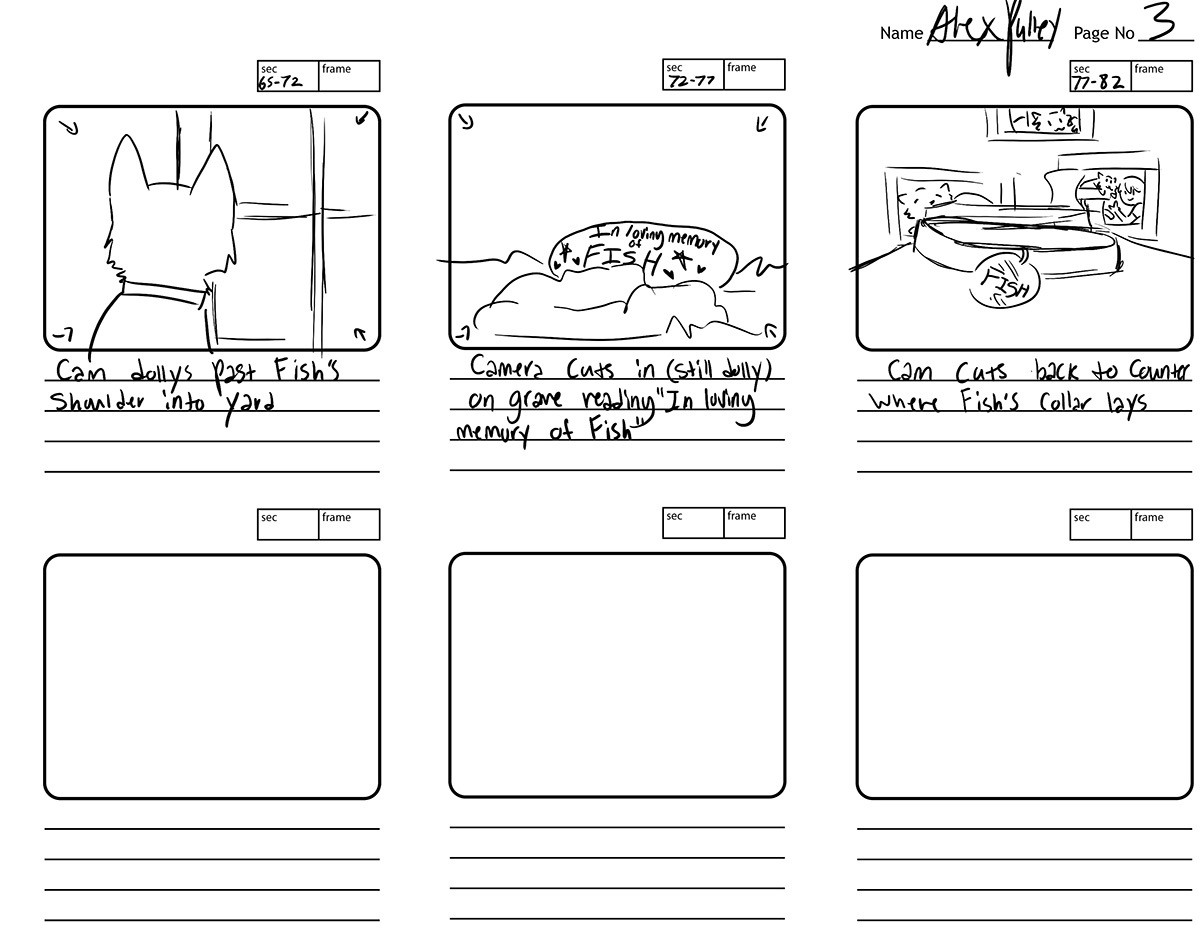
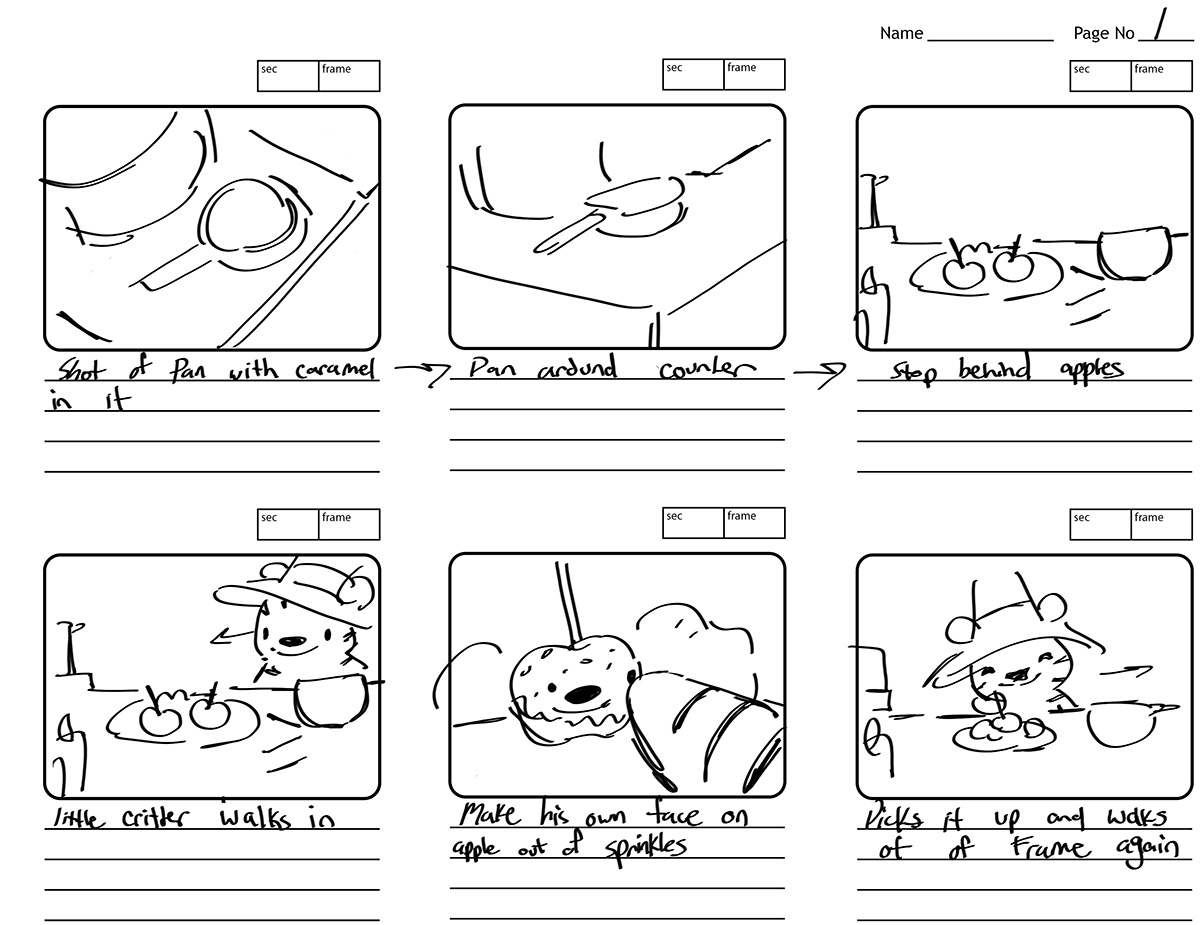
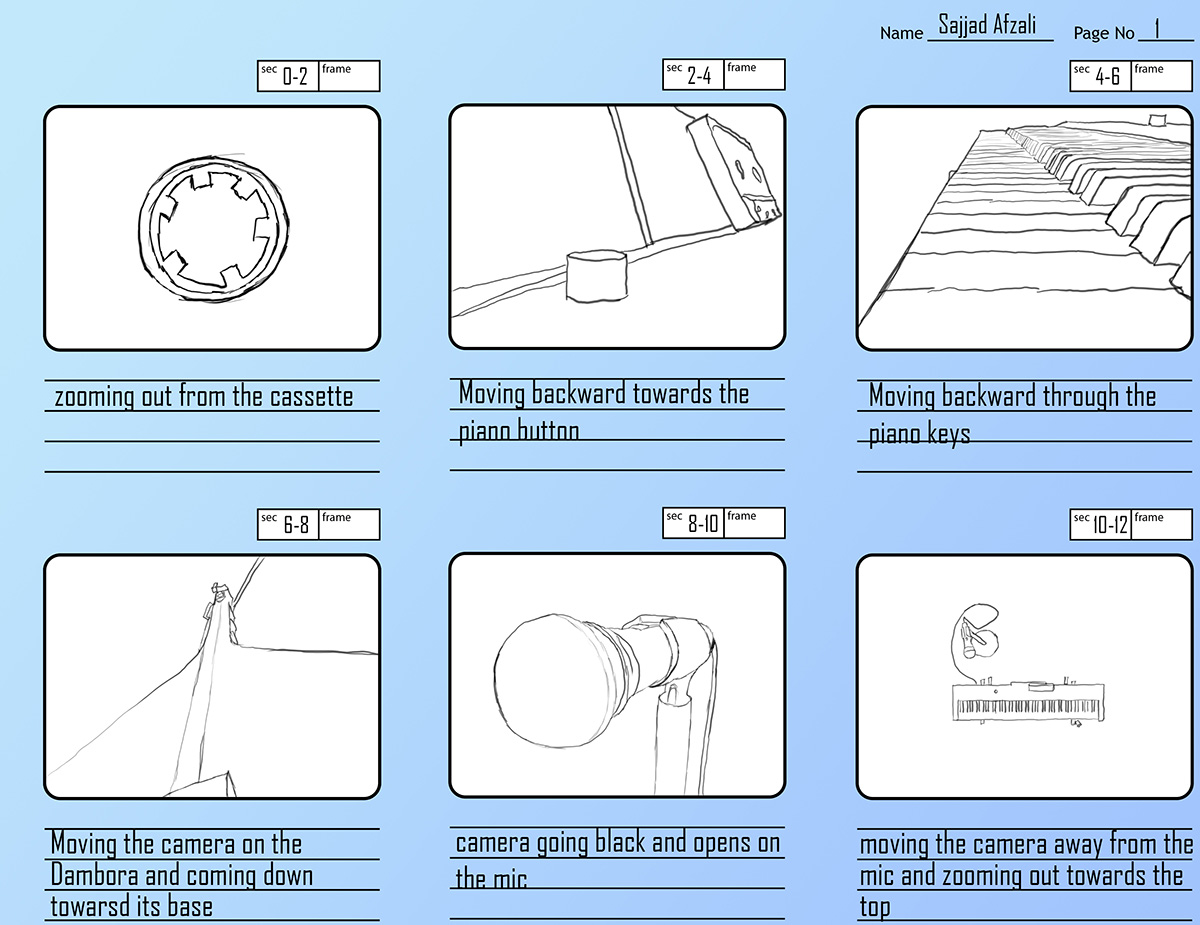
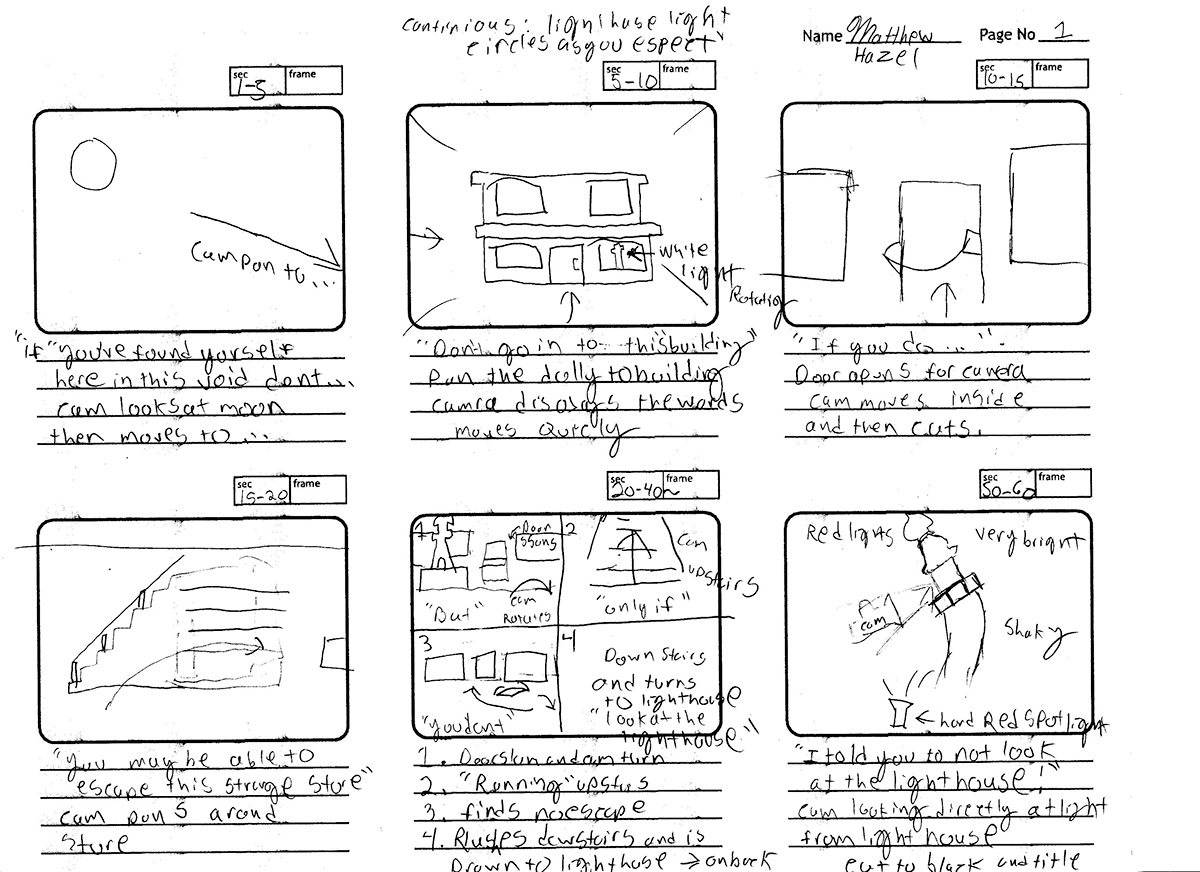
Stotyboard
For most creatives, the best ideas start on paper; the same goes for animators. Whether you're a pro animator, or just getting started, learning how to create a storyboard is essential to the animation process.
- What’s a storyboard?
- A storyboard is a series of drawings and annotations based on a script or story idea. Once it's complete, the storyboard is used as a visual guide during the production of the final animated videos.
- It should show a sequence of frames illustrating each shot and other key moments of your animation.
- Don't be overly concerned with the quality of art. Information about timing,
specific camera movements, lighting, and transitions, or special effects should also be included.
- A storyboard is a series of drawings and annotations based on a script or story idea. Once it's complete, the storyboard is used as a visual guide during the production of the final animated videos.
- A brief history of storyboarding
- The storyboard concept was first developed at the legendary Walt Disney studios during the early 1930s. One of the studio's writers, Webb Smith, was known for drawing sequential scenes on sheets of paper and pinning them up on a bulletin board to tell a full story.
- The first complete movie storyboards were created for the 1933 Disney short film <Three Little Pigs>. By 1938, all animation studios and the animation production process in the United States had begun using storyboards before they started production.
- The storyboard concept was first developed at the legendary Walt Disney studios during the early 1930s. One of the studio's writers, Webb Smith, was known for drawing sequential scenes on sheets of paper and pinning them up on a bulletin board to tell a full story.
- Why is a storyboard so important?
- It helps you stay organized: When you first come up with a brilliant idea for an animation, it's tempting to jump right in and start making it a reality. However, it can be easy to get lost and unfocused if you don't have the full picture. A proper plan makes everything easier, and that's where the benefits of storyboarding come in.
- It helps you stay organized: When you first come up with a brilliant idea for an animation, it's tempting to jump right in and start making it a reality. However, it can be easy to get lost and unfocused if you don't have the full picture. A proper plan makes everything easier, and that's where the benefits of storyboarding come in.
- It saves you time
- Even though creating a storyboarding stage is an extra step that will take some work, it will save you time in the long run. If you're making an animation for a client, sending them an initial storyboard allows them to request any changes before production begins. It"s much easier (and cheaper) to adjust a scene and visual elements in a storyboard than a fully animated one.
- Even though creating a storyboarding stage is an extra step that will take some work, it will save you time in the long run. If you're making an animation for a client, sending them an initial storyboard allows them to request any changes before production begins. It"s much easier (and cheaper) to adjust a scene and visual elements in a storyboard than a fully animated one.
- It'll show you if you've missed some necessary details
- Another reason why storyboards are so important is that they allow you to identify weak points and holes within a story. When looking at a storyboard, it's usually pretty clear when a scene isn't quite right or something is missing. During this stage, you can work on filling in the pre-production art gaps until your ideas are fully fleshed out. Once you have a solid plan, you can feel confident that production can begin.
- Another reason why storyboards are so important is that they allow you to identify weak points and holes within a story. When looking at a storyboard, it's usually pretty clear when a scene isn't quite right or something is missing. During this stage, you can work on filling in the pre-production art gaps until your ideas are fully fleshed out. Once you have a solid plan, you can feel confident that production can begin.
- Types of storyboards
- Whether you're working alone on a solo project or with a team on a huge production, some types of storyboards are better suited than others.
- Whether you're working alone on a solo project or with a team on a huge production, some types of storyboards are better suited than others.
- Tips for making your storyboard
- Once you've decided on the type of storyboard you want to create, grab a piece of paper or open up your computer. The storyboarding process is simpler than you might think and offers animators many benefits.
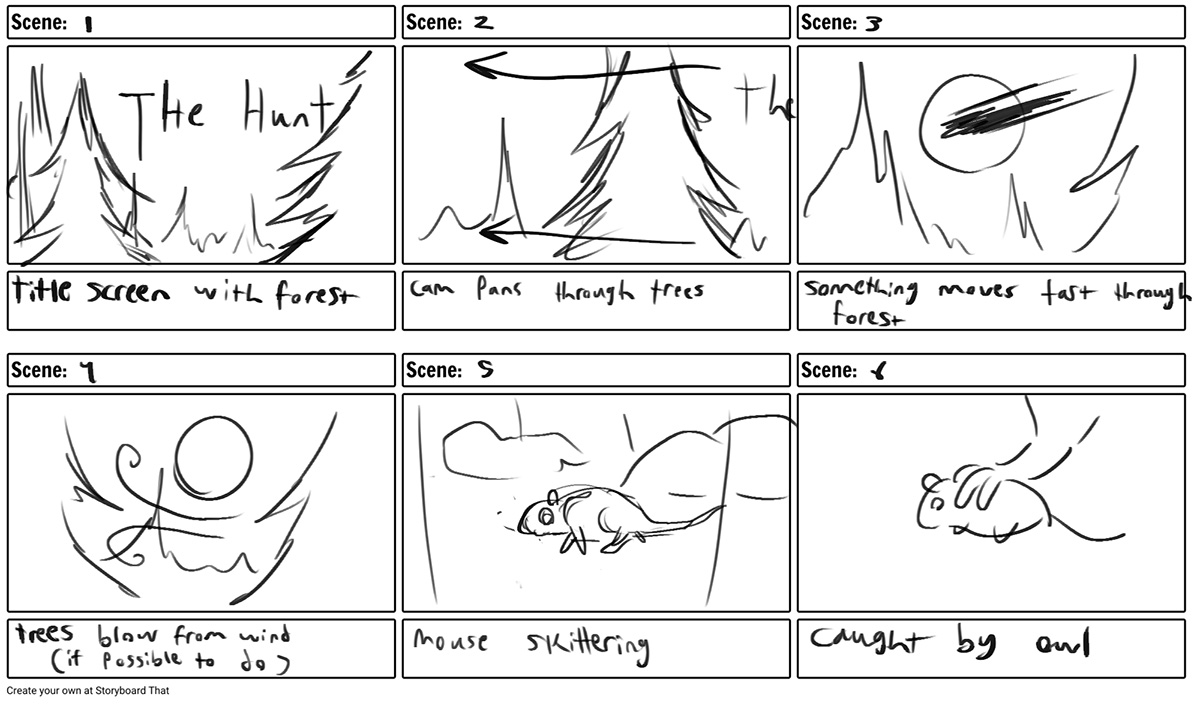
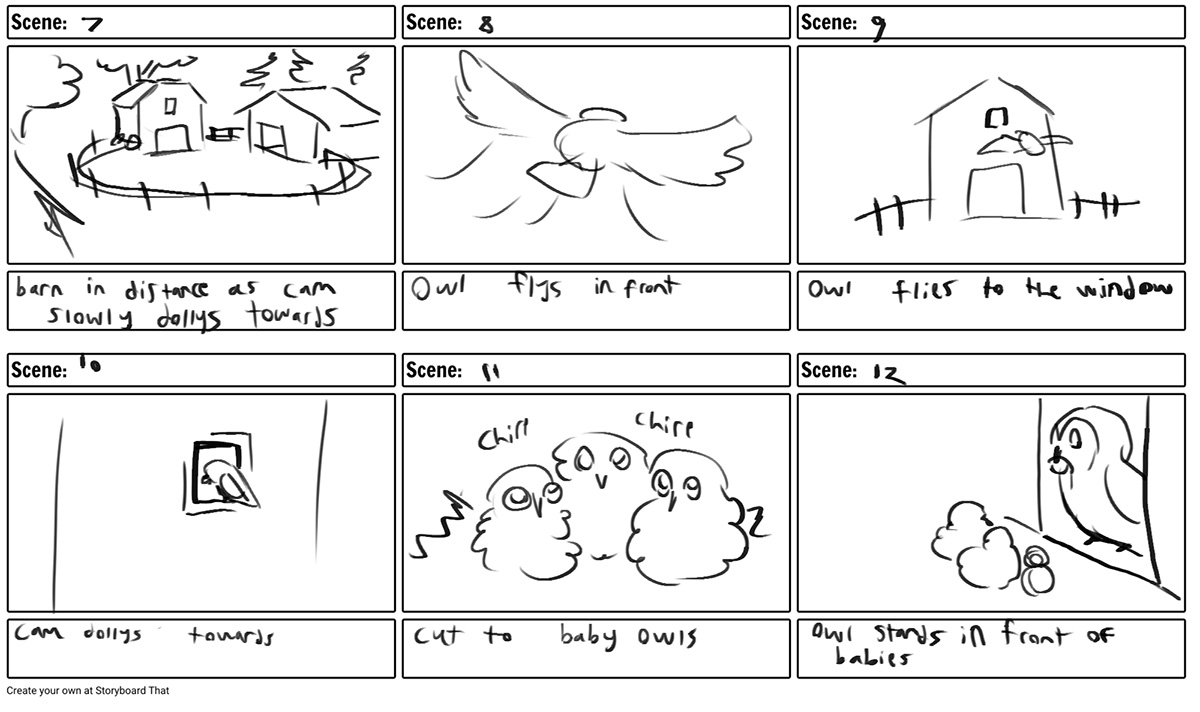
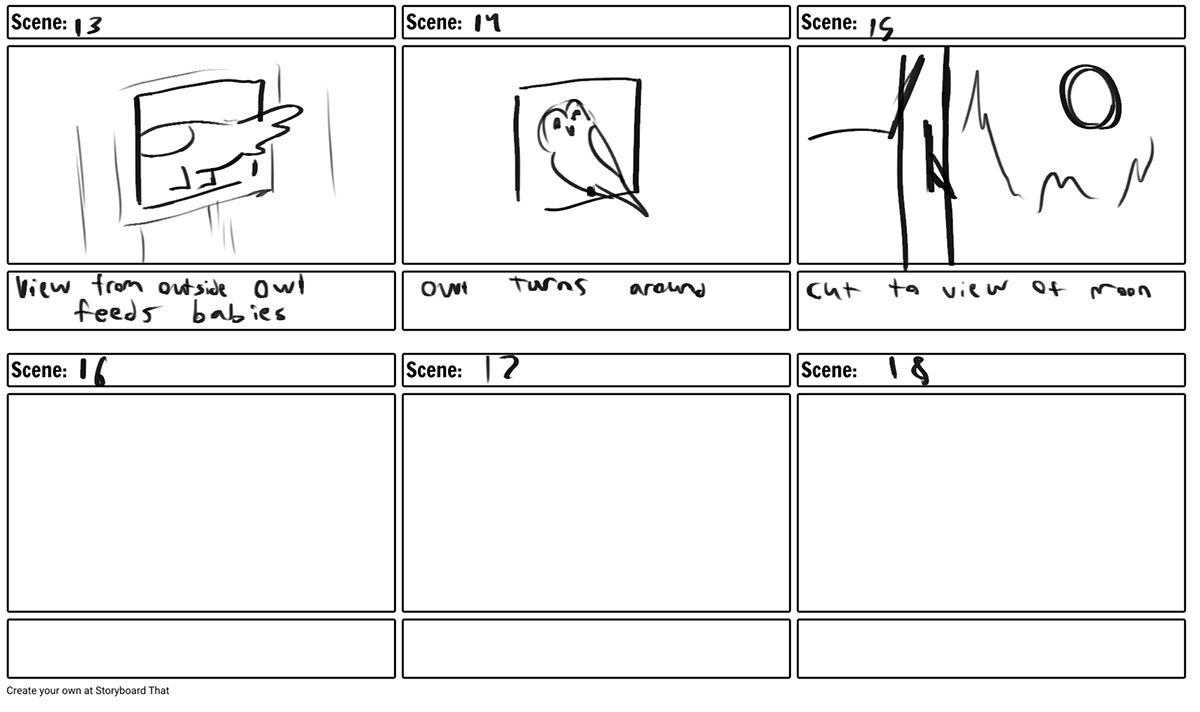
- Break down your script
Whether you plan to make an animated short or a feature-length film, it's important to dissect your script or character dialogue into smaller scenes and key shots. Make sure to number each section to label your storyboard panels. You can refer to this shot list later during the production of the animated sequence.
- Define your visual style
This step is particularly important when you're working with an animation client. The visual style of animation can't be communicated through a script alone, so it must come through the storyboard to bring the stories to life. This is the time to consider your color palette, character designs, dialogue, key shots (dramatic shots, individual shots, etc), and backgrounds. But if you're still unsure which direction to go, gathering reference images in an inspiring mood board can be helpful before starting your storyboard. List everything you must draw in your visual layout, like key scenes and the sequence of events according to your script during this stage.
- Start drawing
Establish the location of your scene in the first panel, and then match the sections of your script with the frames you want to create. Fill in each panel with sketches or illustrations that show the most important parts of the story (like character movements). But remember that your storyboard is not the finished product, so you shouldn't be too detailed here.
- Add descriptive notes
Once you have your visuals, you can add more details and visual descriptions with handwritten notes. You could include any character actions, dialogue, or a brief description of what's happening in each scene and the creative direction.
- Explain any technical details
Directing animators with specific details or action notes about how you want each shot to look is important. For example, add a zoom, pan, tilt, or specific transition to your storyboard if you want to see a zoom pan, a tilt, or a specific transition. These details can be communicated with notes or simple arrows pointing to the direction you want the camera to move, ensuring a coherent story flow.
- Gather feedback
It goes without saying that gathering feedback is an important step for any creative project. Once you've created a first draft presentation of your storyboard for animation ideas, you can expect it will be subject to a few changes. Ask your client, team members, family, or friends for feedback, leave space for comments, and apply any necessary edits. When your team and stakeholders are happy, you can move from pre-production to animation.
- Break down your script
- Once you've decided on the type of storyboard you want to create, grab a piece of paper or open up your computer. The storyboarding process is simpler than you might think and offers animators many benefits.