| DM Tips & Tricks | e-Adventure Tiles | ||
|---|---|---|
|
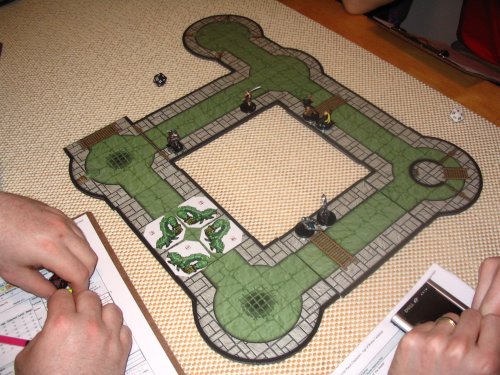
There are a variety of 2D adventure tiles available, but in my opinion, e-Adventure Tiles from SkeletonKey Games are the best around. They are masterfully created game pieces by industry veteran Ed Bourelle. The concept is simple, you buy a PDF that contains a number of pages with a map section on each page. You print the PDF, cut out the pieces, and then arrange them to form any map you want. A staggering variety of terrain is available, from natural caves, stonework dungeons, to wilderness. Now, obviously game pieces made of sheets of paper are not going to hold up to regular use. However, if you laminate them (see Tips & Tricks: Laminate), they become instantly more durable. Using the tips below, you can get even more bang for your buck! Backing and Non-Slip SurfacesFor a lot of people, taping together their e-Adventure Tiles is sufficient. For me, I never liked the look of that, and it also hamstrings you when you need to move tiles around quickly—really, when was the last time your players went where you thought they would? Sheets of paper move around easily, but if you bump them, they scatter. Nothing stops a game like the entire map collapsing. This problem is compounded when you have laminated your pieces, because they are now super slick and will slide the length of the table with just a nudge! It quickly becomes a nightmare trying to keep pieces in place and lined up.
The first thing to do is attach your laminated e-Adventure Tiles to a backing of some sort. Cork would be the best option, because it is naturally non-slip, but it is cost prohibitive. Instead, use foam core board. You can get this at your local Wal-Mart or craft store for next to nothing in 20" by 30" sheets. Depending on your terrain, you may want to back it on black foam core, which costs about twice as much. Either way, it is not a large investment. I measure out 6-inch square blocks on the foam core and cut it with a razor knife. Then, I place the tile on top and trace around it with a pen. Using the same razor, I trim to fit. Once complete, I take a wide glue stick and cover the cut foam core piece and carefully lay the tile on top. I then mash down on the tile and rub across its entire surface to ensure it sticks everywhere. Make sure you do a good job gluing the edges and corners; they get the most wear! The foam core gives some depth to your pieces and makes them much easier to manipulate. However, they still suffer from the same problem of sliding around. Foam core is slick, although not as much as the laminating sheets. At first, I searched for something to attach to the bottom to make them stay put. However, this is a poor plan. If you find some non-slip material, it is generally somewhat costly and you have to use the exact same stuff every time you make new tiles to ensure the height of your pieces match up. If the company making your non-slip product changes their item or goes out of business, you are back at square one. Instead, try this! Measure your gaming surface, whether it is your kitchen table, a library conference table, or whatever. Then, go to Wal-Mart, online, or anywhere that sells rugs and get a non-slip rug pad the size of your table. It is inexpensive to buy once (you can get them for about $11.00, don't pay much more than that or you are getting ripped off). If you spread this out over your table and place your pieces on top, they stick like glue to lateral movement, but you can pick them straight up with no resistance at all. A perfect solution. Usually, rug mats are an ugly biege color. You may search for one that matches your tiles or try for one in black. One thing to consider is writing room. If you cover your entire table with the pad, players cannot roll dice or write on the table, so a smaller pad may be in order. If you opt to cover the whole surface, get some clipboards or other solution to handle a player's need for a table! Custom PDFsThe e-Adventure Tiles come with a color and non-color version of every game piece. You can print print pages individually. Also, you only get one copy of each tile, so if you want a lot of a given piece, you will need to print that one page over several times. If you have Adobe Acrobat (the full version, not the just the Reader), you can make a custom configuration of pages to print.Open an e-Adventure Tile document and extract one page you want to print. Save that one page as a new PDF file. Perhaps something like Sewers_Custom_Print_List.pdf. Now, in the original PDF, extract another page and save it as something like Sewere_temporary.pdf. Go into the first PDF you created and import the second PDF. You know have one PDF that has both the pages you want to print and you have not deleted from or messed up your original e-Adventure Tiles PDF. You can do this over and over until you have one PDF with the all the tiles you want. Maybe you need four corner pieces, two "T" intersections, one "+" intersection, and six straight tunnels. You can extract and import these until they are all in one file, and you can re-print it as many times as you want to continuously expand your collection. Bonus TilesThe SkeletonKey Games web site has bonus tiles available for free download for most of their various tile sets. This is a great way to pick up some extra tiles or to test them out and see if they work for you. Ptolus and Rappan AthukSkeletonKey Games did the maps for the Ptolus and Rappan Athuk adventures. If you decide to play these adventures, you can get e-Adventure Tiles that are specifically made to match the adventures. Being able to present your players with full color 2D maps exactly matching the maps in the adventure is a pretty awesome thing. I have not yet run either adventure, but I'm hoping to at some point. |